
As an Amazon Associate, I earn from qualifying purchases
Using the Bissell Quicksteamer is simple and effective. This guide will show you how to use it step-by-step.
The Bissell Quicksteamer is a great tool for keeping your carpets clean. It is easy to use and very efficient. If you have never used one before, don’t worry. This guide will walk you through each step. You will learn how to set it up, use it properly, and maintain it.
By the end, you will have the confidence to clean your carpets like a pro. Let’s get started and make your home sparkle!
Unpacking The Quicksteamer
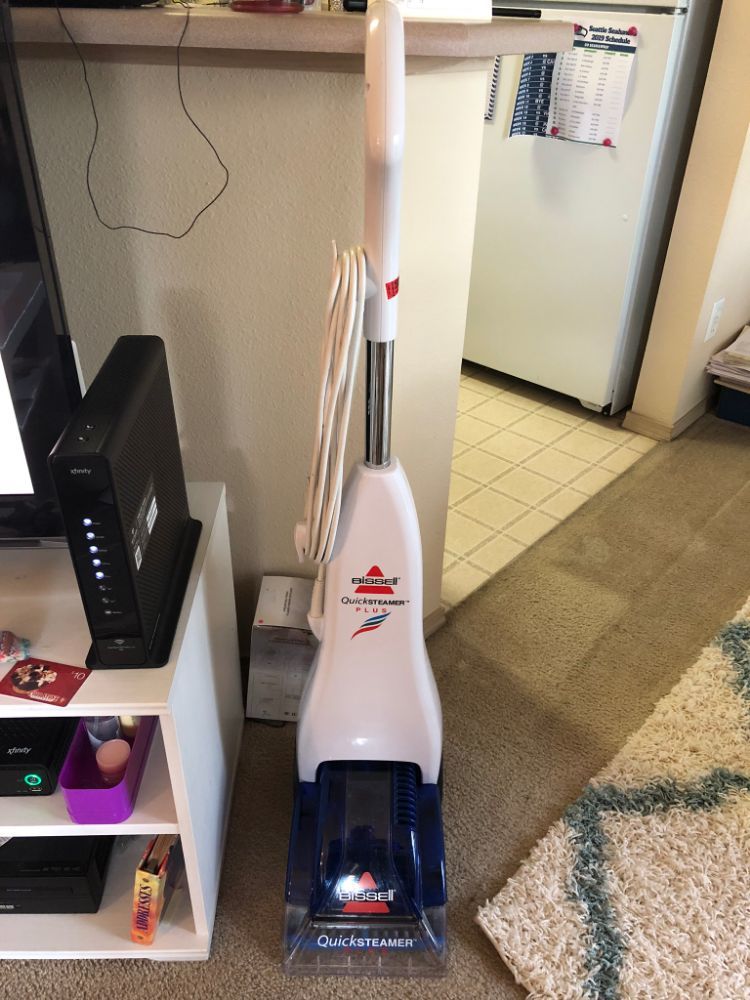
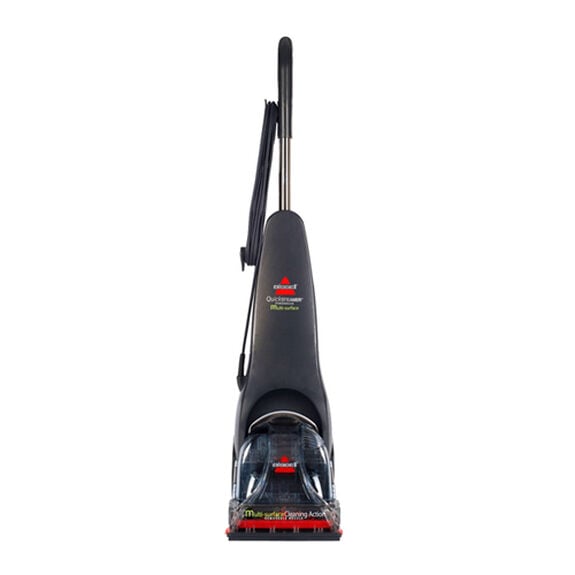
Unpacking your new Bissell Quicksteamer is an exciting moment. You are one step closer to cleaner carpets and floors. This section will guide you through unpacking your Quicksteamer with ease.
Included Parts And Accessories
Inside the box, you will find several parts and accessories. These include the main unit, a water tank, and a cleaning solution bottle. There is also a handle and a few screws.
Check for the user manual. It provides detailed instructions. Ensure all parts are present before you start assembly.
Initial Assembly
Begin by attaching the handle to the main unit. Use the screws provided. Tighten the screws firmly but do not over-tighten.
Next, insert the water tank into its designated slot. Make sure it clicks into place. Fill the tank with water and add the cleaning solution as per instructions.
Finally, plug in your Quicksteamer. Your machine is now ready for use. Follow the user manual for detailed operating instructions.
Credit: www.vacuumland.org
Preparing The Quicksteamer
Before you start cleaning your carpets with the Bissell Quicksteamer, it’s crucial to prepare the machine properly. This ensures effective cleaning and smooth operation. Follow these simple steps to get your Quicksteamer ready.
Filling The Water Tank
- Remove the water tank from the machine by lifting the handle.
- Take the tank to your sink and unscrew the cap.
- Fill the tank with hot tap water. Do not use boiling water.
- Replace the cap and secure it tightly to avoid leaks.
- Place the tank back into the machine, ensuring it clicks into place.
Adding Cleaning Solution
- Locate the solution tank on the Quicksteamer.
- Remove the tank by lifting it out of the machine.
- Unscrew the cap and fill the tank with the recommended amount of Bissell cleaning solution.
- Follow the instructions on the bottle for the correct amount.
- Replace the cap and secure it tightly.
- Place the solution tank back into the Quicksteamer, ensuring it clicks into place.
Now that your Bissell Quicksteamer is prepared, you are ready to start cleaning. Make sure both tanks are securely in place. This ensures optimal performance and prevents any spills.
Pre-cleaning Steps
Before using your Bissell Quicksteamer, follow some important pre-cleaning steps. These steps will help achieve the best cleaning results. Proper preparation ensures your carpets are ready for deep cleaning.
Vacuuming The Area
Start by vacuuming the area you plan to clean. This step removes loose dirt and debris. Use a vacuum cleaner with strong suction. Make sure to cover the entire area. Pay special attention to corners and edges. This helps the Quicksteamer work more effectively.
Spot Treatment For Stains
Identify any stains on your carpet. Apply a suitable stain remover to these spots. Follow the instructions on the stain remover product. Allow it to sit for a few minutes. Blot the stain with a clean cloth. Avoid scrubbing, as it can damage the carpet fibers. Treating stains beforehand helps the Quicksteamer clean more thoroughly.
Operating The Quicksteamer
Learning to use the Bissell Quicksteamer is easy. This section will guide you through the basic steps to operate the device, ensuring you get the best cleaning results.
Powering On The Device
Before turning on the Bissell Quicksteamer, ensure it is correctly assembled. Plug the device into a power outlet.
Locate the power switch. It is usually found on the handle or the base of the unit. Flip the switch to the “on” position. The device should start working. If it does not, check the power connection.
Using The Cleaning Mode
Fill the water tank with hot tap water. Do not use boiling water. Add the recommended amount of cleaning solution to the water tank. Refer to the user manual for the exact measurements.
Next, select the cleaning mode. The Bissell Quicksteamer typically has multiple modes:
- Light Clean: For light dirt and regular maintenance.
- Deep Clean: For heavy dirt and stains.
Press the mode button to choose the desired setting. Start cleaning by pressing the trigger to release the cleaning solution. Move the machine slowly over the area to be cleaned. Let the brushes do their work.
After cleaning, release the trigger and make another pass to suction up the dirty water. Repeat as needed for best results.
Cleaning Techniques
Using the Bissell Quicksteamer effectively involves mastering the right cleaning techniques. This ensures that your carpets and hard floors are spotless. Follow these steps to achieve the best results.
Best Practices For Carpet
Carpet cleaning requires specific steps to ensure thorough cleanliness. Here are some tips:
- Vacuum first: Always start by vacuuming the carpet to remove loose dirt and debris.
- Pre-treat stains: Apply a suitable carpet stain remover on tough stains before using the Quicksteamer.
- Fill the tank: Fill the water tank with hot tap water. Add the recommended amount of cleaning solution.
- Start cleaning: Turn on the Quicksteamer and slowly push it forward. Press the spray trigger to release the solution.
- Pull back slowly: Release the trigger and pull the machine back slowly. This allows the suction to remove the dirty water.
- Repeat: Repeat the process on heavily soiled areas.
Cleaning Hard Floors
Hard floors require a different approach. Follow these steps for best results:
- Sweep first: Use a broom or vacuum to remove loose dirt and debris.
- Fill the tank: Fill the water tank with warm water. Add the recommended amount of hard floor cleaning solution.
- Start cleaning: Turn on the Quicksteamer and move it forward. Press the spray trigger to release the cleaning solution.
- Scrub gently: For tougher spots, gently scrub with the machine’s brush.
- Pull back slowly: Release the trigger and pull the machine back to suction up the dirty water.
- Dry the floor: Allow the floor to air dry or use a clean towel to wipe it dry.
Post-cleaning Maintenance
Maintaining your Bissell Quicksteamer is crucial for its longevity. After cleaning, proper maintenance ensures the machine stays effective. This guide will help you through the essential steps.
Emptying And Rinsing The Tank
First, unplug the Quicksteamer. Remove the dirty water tank. Open the lid and pour out the dirty water. Rinse the tank with warm water. Ensure all residue is gone. Clean the filter too. A clean tank prevents bad smells and mold.
Storing The Quicksteamer
After cleaning, dry the machine. Wrap the cord neatly. Store the Quicksteamer in a dry place. Avoid damp areas. Moisture can damage the parts. Keep it upright to prevent leaks. Regular storage checks help keep the Quicksteamer in good condition.
Troubleshooting Tips
Using the Bissell Quicksteamer can make your carpets look new again. But, like any appliance, you may face some issues. This section will help you troubleshoot common problems. These tips can save time and keep your cleaner working well.
Common Issues And Solutions
Sometimes, the Bissell Quicksteamer may not spray water. First, check if the water tank is full. Next, ensure the tank is properly seated. If the tank is fine, clean the spray nozzles. They might be clogged with dirt.
Another common issue is poor suction. Check the dirty water tank. It might be full. Also, ensure the tank lid is secure. If suction is still weak, clean the filter. A dirty filter can block airflow.
If the machine is hard to push, check the brush roll. Hair or debris may be wrapped around it. Remove the brush roll and clean it well. This can make a big difference.
Customer Support Information
If these tips don’t solve the problem, contact Bissell’s customer support. They offer help through phone, email, and live chat. Visit the Bissell website for contact details. Have your model number and purchase date ready. This information helps them assist you faster.
For warranty claims, keep your receipt handy. Bissell’s support team can guide you through the process. They aim to make sure your Quicksteamer works like new.

Credit: www.auctionninja.com
Credit: www.bissell.com
Frequently Asked Questions
How To Assemble Bissell Quicksteamer?
To assemble the Bissell Quicksteamer, attach the handle to the base. Secure it with screws provided. Attach the water tank and solution tank.
How To Fill The Bissell Quicksteamer Tank?
Remove the clean water tank. Fill with hot tap water up to the fill line. Add cleaning solution if necessary.
Can I Use Any Detergent?
Use only Bissell approved cleaning solutions. Other detergents may damage the machine or void the warranty.
How To Clean The Bissell Quicksteamer?
After use, empty and rinse the tanks. Clean the nozzle and brushes. Let all parts dry completely.
Conclusion
Using the Bissell Quicksteamer is simple and effective. Just follow the steps mentioned. Your carpets will look cleaner and fresher. Regular use keeps your home spotless. Make sure to maintain the machine properly. This ensures it lasts longer and works efficiently.
Enjoy a cleaner living space with less effort. Happy cleaning!
As an Amazon Associate, I earn from qualifying purchases