As an Amazon Associate, I earn from qualifying purchases
The vacuum hose connector is essential in various systems, from household vacuum cleaners to automotive engines. Removing a vacuum hose connector can be daunting, especially if you must familiarize yourself with the process. This guide will provide a comprehensive, step-by-step approach to safely and effectively remove vacuum hose connectors, ensuring you avoid common pitfalls and damage to your equipment.
Removing a vacuum hose connector can seem daunting, whether you’re dealing with a household vacuum cleaner, an automotive engine, or any other system that uses these connectors. Understanding the process is crucial to avoid damaging the equipment and ensure a smooth removal. This comprehensive guide will take you through the various types of vacuum hose connectors, the necessary tools, the safety precautions to observe, and a detailed, step-by-step process for removing different connectors.
Types of Vacuum Hose Connectors
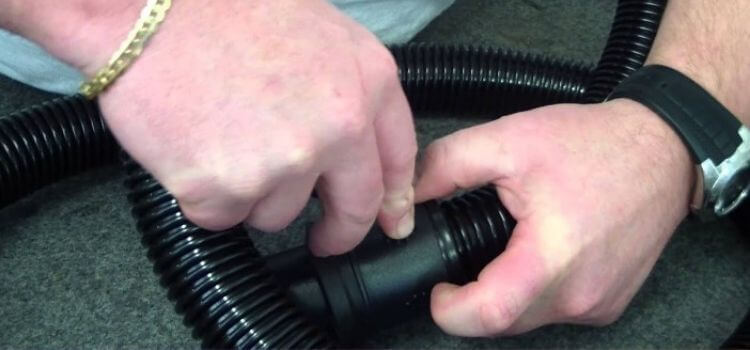
Push-On Connectors
Push-on connectors are commonly used in various applications due to their ease of use. These connectors are designed to be pushed onto a fitting and held in place by the friction between the hose and the fitting.
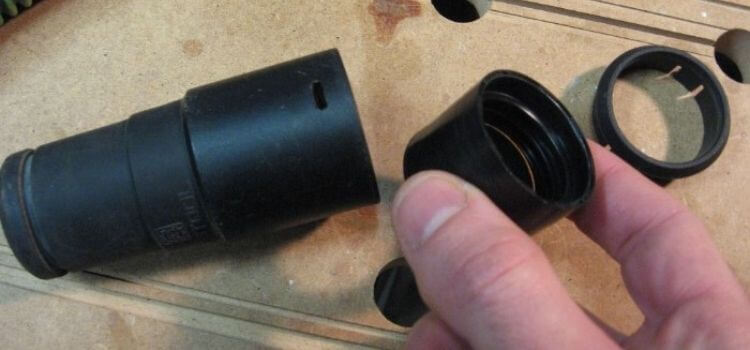
Screw-On Connectors
Screw-on connectors, also known as threaded connectors, are secured by screwing a threaded end onto a corresponding fitting. These connectors provide a secure and leak-proof connection and are often used in applications requiring high pressure or a tight seal.
Quick-Connect Fittings
Quick-connect fittings are designed for ease of use and quick disconnection. These connectors typically have a release mechanism that allows the hose to be easily removed without tools.
Barbed Fittings
Barbed fittings are designed to be pushed into the hose, with the barbs preventing the hose from slipping off. These fittings are commonly used in low-pressure applications and are often secured with hose clamps.
Tools and Materials Needed
Basic Tools
- Screwdrivers: Flathead and Phillips screwdrivers are essential for loosening and removing screws.
- Pliers: Regular and needle-nose pliers help grip and pull connectors.
- Utility Knife: Useful for cutting hoses if necessary.
Specialty Tools
- Hose Removal Pliers: These pliers are designed to grip and remove hoses from fittings.
- Heat Gun: A heat gun can soften hoses, making them easier to remove from barbed fittings.
Safety Equipment
- Gloves: Protect your hands from sharp edges and debris.
- Goggles: Protect your eyes from dust and other particles.
Safety Precautions
Importance of Safety Measures
Safety is paramount when working with vacuum hose connectors. The process often involves sharp tools and the potential for flying debris, which can cause injury if proper precautions are not taken.
How to Ensure a Safe Working Environment
- Clear the Area: Ensure the workspace is clean and free of obstructions.
- Ventilation: Work in a well-ventilated area to avoid inhaling dust or fumes.
- Lighting: Ensure adequate lighting to see what you are working on clearly.
Handling Tools Safely
- Proper Grip: Always use tools with a proper grip to prevent slipping.
- Tool Condition: Regularly inspect your tools for wear and tear and replace them if necessary.
- Focus: Avoid distractions and focus on the task to prevent accidents.
Preparing for Removal
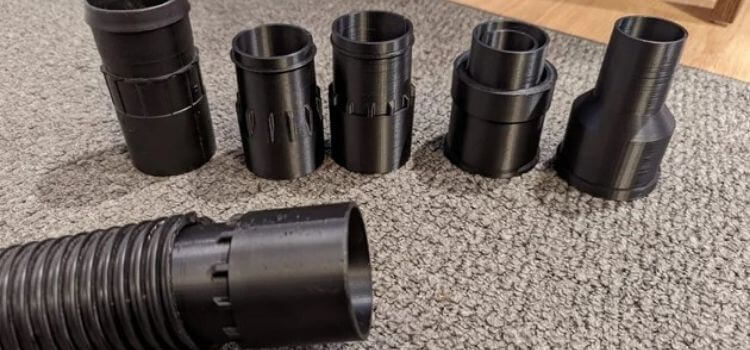
Identifying the Type of Connector
Before attempting to remove a vacuum hose connector, it’s crucial to identify the type of connector you are dealing with. This will determine the tools and methods you will use.
Assessing the Condition of the Hose and Connector
Check the hose and connector for any signs of wear, damage, or corrosion. This assessment will help you decide whether the connector can be removed intact or needs to be cut off.
Gathering Necessary Tools
Ensure you have all the necessary tools and safety equipment before starting the removal process. This preparation will make the process smoother and more efficient.
Step-by-Step Removal Process
- Removing Push-On Connectors
Description of Push-On Connectors
Push-on connectors are typically used in applications where ease of installation and removal is essential. They stay in place by relying on the tight fit between the hose and the fitting.
Detailed Removal Steps
Depressurizing the System
Before attempting to remove the connector, ensure that the system is depressurized. This step is crucial to avoid injury from pressurized fluids or air.
Using Pliers to Loosen the Connector
Use pliers to grip the connector and gently twist it back and forth. This action will help to break the seal and make the connector more straightforward to remove.
Twisting and Pulling the Connector Off
Once the connector is loose, twist and pull it off the fitting. Be patient and avoid using excessive force, which could damage the hose or fitting.
- Removing Screw-On Connectors
Description of Screw-On Connectors
Screw-on connectors are secured by threading them onto a fitting. They are commonly used in applications requiring a secure and leak-proof connection.
Detailed Removal Steps
Identifying the Screw Direction
Determine where the connector needs to be turned to loosen it. Typically, this will be counterclockwise.
Using a Screwdriver to Loosen the Connector
Use the appropriate screwdriver to turn the connector in the correct direction. Apply steady pressure to avoid stripping the screw.
Removing the Connector Carefully
Once the screw is loose, carefully remove the connector from the fitting. Take care not to damage the threads or the fitting.
- Removing Quick-Connect Fittings
Description of Quick-Connect Fittings
Quick-connect fittings are designed for easy and rapid disconnection. They typically have a release mechanism that removes the hose without tools.
Detailed Removal Steps
Depressing the Release Mechanism
Locate the release mechanism on the fitting. This may be a button or a collar that needs to be depressed.
Pulling the Hose Gently
While holding the release mechanism, gently pull the hose away from the fitting. The hose should come off quickly without the need for excessive force.
- Removing Barbed Fittings
Description of Barbed Fittings
Barbed fittings are designed to grip the inside of the hose, preventing it from slipping off. These fittings are commonly used in low-pressure applications.
Detailed Removal Steps
Cutting the Hose if Necessary
If the hose is stuck on the barbed fitting, it may be necessary to cut it. Use a utility knife to make a clean cut near the fitting.
Loosening the Barbs with Pliers
Use pliers to grip the barbed fitting and gently twist it back and forth. This action will help to loosen the barbs from the inside of the hose, making it easier to remove.
Common Challenges and Solutions
Stuck Connectors
If a connector is stuck, apply a penetrating lubricant and allow it to sit for a few minutes before attempting to remove it again. This should help to loosen the connection.
Damaged Hoses
If the hose is damaged, it may need to be replaced. Always inspect the hose for wear and tear before reattaching it to a new connector.
Stripped Screws
If a screw is stripped, use a screw extractor tool to remove it. Be careful not to damage the surrounding material while doing so.
Preventive Maintenance
Regular Inspection of Hoses and Connectors
Regularly inspect hoses and connectors for signs of wear, damage, or corrosion. Early detection of issues can prevent more severe problems.
Proper Storage and Handling
Store hoses and connectors in a clean, dry place to prevent damage. Handle them with care to avoid bending or crushing them.
Replacing Worn-Out Connectors
Replace any connectors that show signs of wear or damage. Using worn-out connectors can lead to leaks and other issues.
Personal Stories or Case Studies
Real-Life Examples of Successful Removal
An automotive enthusiast, John faced a stuck vacuum hose connector while working on his car’s engine. After applying a penetrating lubricant and using hose removal pliers, he successfully removed the connector without damaging the hose.
Lessons Learned from Difficult Removals
Samantha, a homeowner, struggled with a quick-connect fitting on her vacuum cleaner. She learned the importance of using the correct release mechanism and now ensures she understands how each connector works before attempting removal.
Expert Insights
Tips from Professionals
- Always use the right tool to avoid damaging connectors or hoses.
- If a connector is particularly stubborn, applying heat can sometimes help to loosen it.
Common Mistakes to Avoid
- Forcing a connector off without properly loosening it first can damage both the connector and the hose.
- Neglecting to depressurize the system can lead to injury or damage to the equipment.
Conclusion
Removing vacuum hose connectors can be a manageable task. By understanding the types of connectors, using the right tools, and following a systematic approach, you can safely and effectively remove them from any system. Regular maintenance and proper handling will also help extend the life of your hoses and connectors, ensuring they remain in good working condition.
As an Amazon Associate, I earn from qualifying purchases